
Last year was all about Christmas crafting for others, this year is about Christmas crafting for the house. I was all set to get my fix with felted ornaments but when I saw the gorgeous patterns that Amy Butler put up for Christmas on her website for FREE, I knew I had to make at least one of them. Although you can’t see it an any of these pictures I have a bit of a Charlie Brown Tree, not very full and obviously fake, but I love it anyway, especially with the addition of Christmas Tree scent 🙂 . What I didn’t love was the fake snow blanket that surrounded it every year. Now at least the bottom of my tree looks like a million bucks!
Pattern: Amy Butler Tree Skirt
Fabric Used:
Trim – Michael Miller Pod Ditz
Inner Fabric – Quilted Fabric from JoAnn’s
Lining Fabric – New Chick on the Block’s Ever Changing Shapes
Notions Used: 1.5″ covered buttons
Pattern Alterations: Used quilted fabric instead of wool felt, used 1.5″ buttons instead of 2.5″, no interfacing
The Good:
- Another wonderful FREE…yes…FREE pattern by Amy Butler (pdf link)
- I liked the fact that I used the quilted fabric instead of the wool felt for a few reasons. One – I was dreaming of a quilted tree skirt for some time and was happy to find this fabric at JoAnn’s. Two – I am cheap and wool felt is kinda expensive, Three – I didn’t have to interface that huge piece of fabric because it is quite thick already, and Four – My cats love sleeping under the tree and felt is the mother of all cat hair collectors.
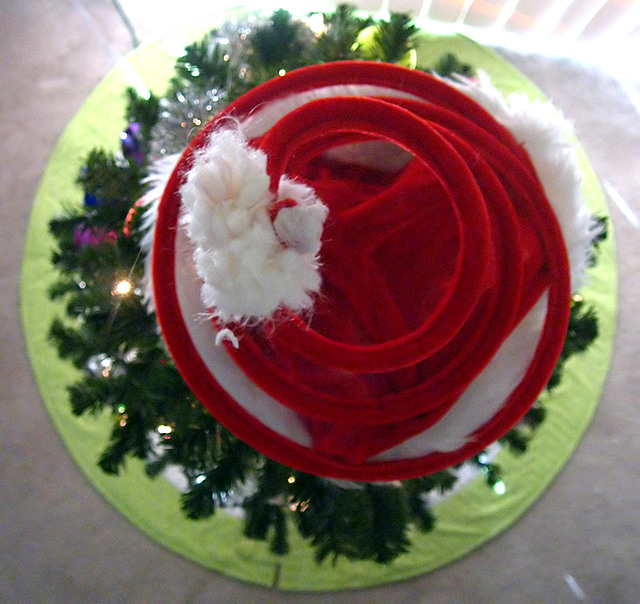
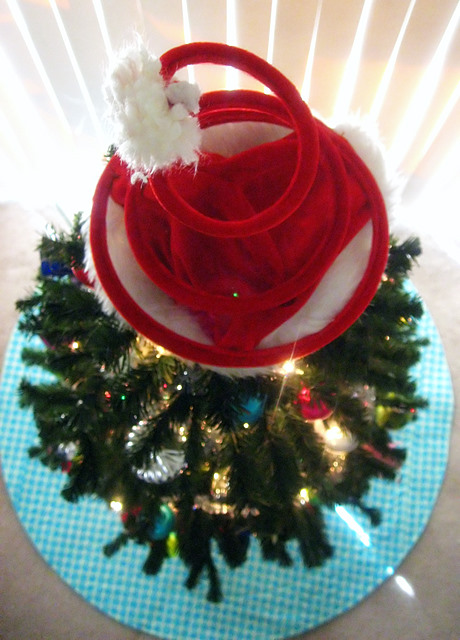
- I love the reversibility of the tree skirt. One side is a little more subdued, the other is kinda funky. It lends itself to having quite a lot of versatility through the years
- For some reason, I just loved how you cut out the inner fabric using the pin in the center and then using the string to mark your perfect circle. Geeky…yes I know.
The Bad:
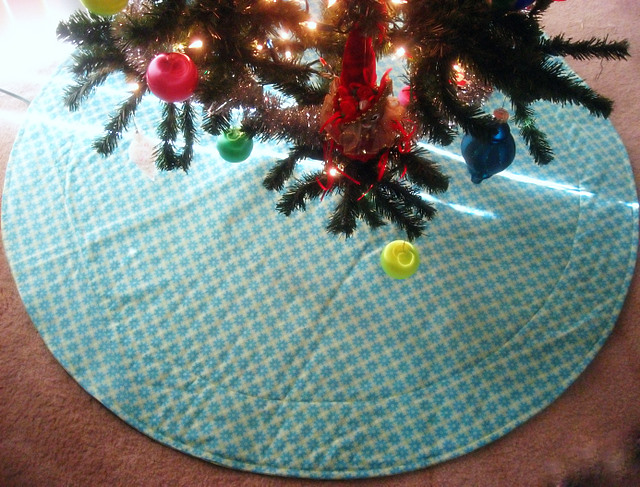
- Pay attention because the lining fabric calls for 54″ wide fabric. 54″ was not readily available at my quilting shop and my piece was already cut by the time I figured this out. So I asked her to cut another .5 yards. Which was lucky because I needed it cut just like that, because you are going for width not length. I simply pieced the fabric to the sides to make it wide enough to accommodate the circle. It worked out quite nice especially because I don’t have a directional fabric.
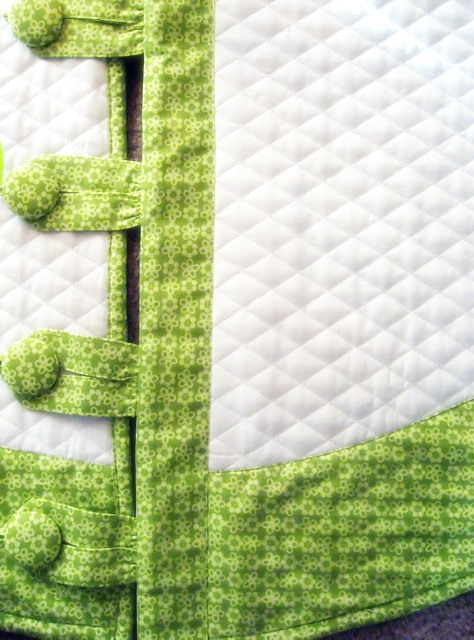
- 2.5″ covered buttons! Once again, not readily available in my circle of craft shops so I opted for 1.5″ and used 5 instead of 4.
The Ugly:
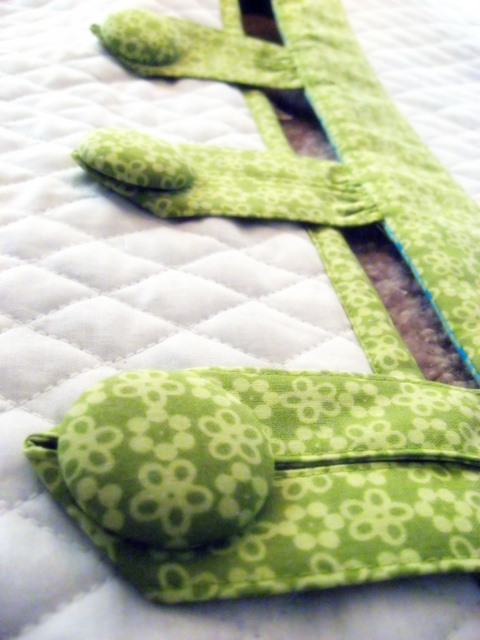
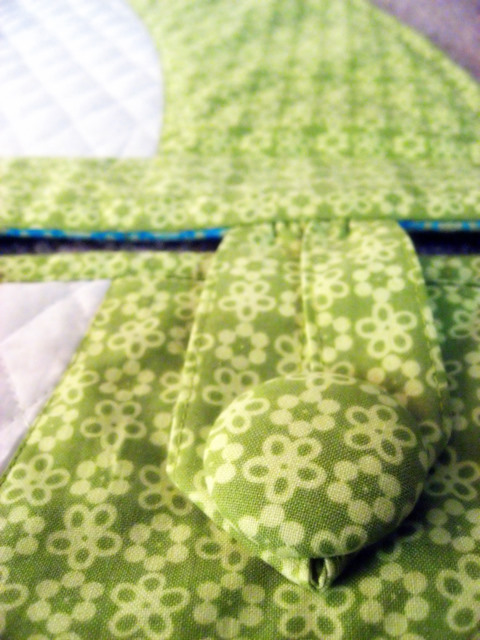
- Interface the button loops?! Ok, this was frustrating because I used a woven interfacing to interface these pieces the first time. Then tried to gather…way too thick, broke both gathering threads. I then tried a very thin non-woven interfacing…still no dice. It took all my strength to cinch the tiniest bit. I then tried no interfacing at all and it was still a bit of a challenge but actually worked that time.
All in all a wonderful project and I highly recomment spicing up the tree with this beauty!
Yay!!! It’s beautiful!
Wow, I love both sides. And I adore the humor – The Good, the Bad and the Ugly is one of my favorite movies!!! The buttons and loops came out particularly nice. Overall effect is super cute.
I love your tree skirt! I hadn’t seen these AB patterns before–great find!
~Sarah
Gorgeous tree skirt! I love your color choices and the covered buttons are fab!
This turned out great! Well worth the time.
I followed your post here from craftster and just wanted to say that your tree skirt is beautiful! Thanks for sharing the link to the free patterns. I’m off to make a tree skirt!
I need to make a tree skirt too and this one is lovely. I really like the colours you’ve used. Very funky! Thanks for sharing this.
This is so pretty! I love it.
I love it! Hmm…perhaps it’s not *quite* time to put the machine away.
Your tree skirt is so flirty and cute! You always do such a good job, and then explain it all to us. Thank you so much! And have yourself a very Merry Christmas!
Wow, that is a great tree skirt. I am showing that to my oldest dd, I think she would love the style.
Cute!
It’s lovely!
Yay! I’ve been meaning to make my parents a tree skirt and this is the perfect reminder. Here’s what I really love, though: I clicked through to the AB patterns before reading your post, downloaded the tree skirt, started adding up the cost of all the materials in my head, and got totally discouraged by what an expensive project it was–and then clicked back here to find your awesome suggestions for making it much more economical. Thanks for the inspiration on both counts!
That is too funny! I saw that tree skirt pattern on the Amy Butler website and downloaded it last Friday! I’m still working on the skirt w/ fabric from my stash! I fell in love w/ the pattern when I first saw it.
Wow, this tree skirt came out fantastic!!! You did an awesome job, I especially love the quilted fabric and the green – so pretty!
You’ve been busy! Love it!
That is one very cool skirt for that tree…so cool it could go out on the town in it! Nice work!
How did you know!!! I totally wear it out of the house…hee hee…just kidding but I do agree that it is quite pretty :O)
That’s GORGEOUS!!!
Thanks for posting this. I fell in love with the skirt, but was rather disappointed to see it was wool felt in the center. I would never even have thought to use something else.
Really special!
My cats love to get under the Christmas tree. Unfortuneately they don’t just sleep…too many “toys” to bat about.
Thinking about making this skirt, but all the lining fabrics I like (eg Amy Butler wall flower lotus) are 44″. I’m a sewing novice… thoughts on how to make this work with that fabric?
Your skirt is beautiful, and I’m eager to try my own! But I have the same question as Jenn, about how you managed to make the lining work with 45″ fabric. That is mostly what I’m finding as well, and I’m not sure what you meant about piecing the fabric to the sides to make it work. Could you please elaborate on that for us beginners? Thanks!
Hi Beth,
Thanks for the wonderful compliment!!! I don’t know if I can explain it that well but you basically stitch your fabric together, Right side to right side, to make a tube and then cut through the middle of one of the pieces to get two smaller pieces on the edge and one big piece in the middle. This keeps the seam from being smack dab in the middle and obvious. For mine I just needed a little bit on the sides so the two pieces did not have to be the same size. You can find more information by googling piecing a quilt back. Here is a like to one that I think explains it fairly well.
http://www.reddawn.net/quilt/backings.htm
If you still need help let me know and I will send you some pics.
Hi,
Thanks so much for the explanation! That definitely helps. When my daughters are back in school next week, I”ll be off to the fabric store and ready to start my own. I appreciate the help and inspiration!
Beth
Beautiful work… I’m about finished with my own but am having a hard time understand the instructions when it comes to applying the wide trim piece and the button loops… “pull button loops through.” Will that be self-explanatory when I actually do it? I’m having a hard time envisioning. Also, I found my thin trim piece to be too small. I had to cut it again wider. So maybe I’m interpreting the pattern wrong. And I agree about the interfaced button loops. Ugly! I had to remake them as well. Thanks.
It looks so stinkin cute! I love it! I can’t get the pdf file to work. Is there anyone that maybe you could email the pdf file to me? Thanks!
I love it as well! So instead of using the felt you used the already quilted material from Joanns, did you sew the trim over that and the backing as well?
Hi Jan,
Yes, that is exactly what I did. Worked like a charm
I’m puzzling over why the instructions call for sewing the lining and top right sides together, and then turning the whole thing inside out — since the edges will be covered by the contrasting trim (with the exception of the very inner circle, which I think I could deal with in another way). Seems it would be less bulky to just place the pieces wrong sides together and then apply the beautiful edging. What do you think? Am I missing something? Don’t you love how this thread has kept going since 2008?! : )
Just took my tree down today and decided that I need a new tree skirt. I saw this pattern today, but it only shows a little piece of the skirt, so I thank you for the pictures. Yours came out beautiful. I totally agree that the wool felt is too expensive (and collects cat hair like a magnet). Great idea to use the quilted fabric. I think I’ll up-cycle my current tree skirt using some of the details of this pattern.
So helpful, Injust recut my button loops tonight (sans interfacing). This pattern really is poorly written…
If I were to make again, I’d use bias tape to finish the inner circle and skip all the nonsense of sewing right sides together. Way too much room for error in cutting and sewing otherwise.
Well done!
I all the time used to read article in news papers but now as I am a
user of web thus from now I am using net for content, thanks to web.
Pingback: SewMyStash2015 Holiday in July! | Project: Leasa