
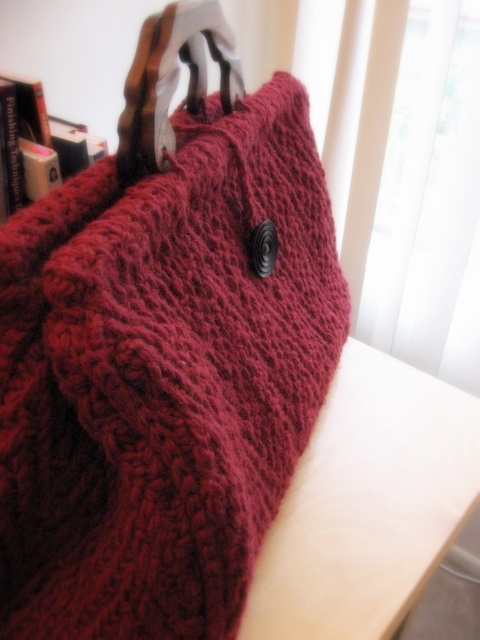
Back by popular demand….knitting. Yes, despite my newest distraction,sewing, I do still knit. Here is proof…the Knit Two Together Doctor’s Bag! This bag was one of the major reasons for buying the book. I loved this bag and still like it a lot.
Yarn: Valley Yarn Berkshire
Inspiration: Knit Two Together Doctor’s Bag
Needles: Size 11
Yardage: 8 skeins
Modifications: Used boning on at the side edges for stability
Enjoyment Factor:7
- The Good:
- The pattern: It was pretty easy all around and the herringbone stitch kept me entertained. I really like the idea that it is not felted. Everyone presumes that a bag this size must have been felted but alas no, this is all knitting and no felting.
- I really love my handles that I bought from Wildfibers, which is/was owned by the author of Knit Two Together. I just had to have these handles as I think they make the bag and was so happy when I happened to find them there.
- I bought the button in Santa Fe and although it does not match with the handles in color, I still like it 🙂
- The size….I have mixed feelings about the size because I like the fact that it is a big bag, but I do not have enough knitting to fill it. This is a damn big bag people! I saw it in person and the size in the picture but still didn’t grasp the fact that it would be that big. But I still love it because it is BIG and I have never had that before. This will pretty much be my knitting group bag, because I normally like my knitting a little more portable than this bag allows.

- The Bad:
- The pattern for the bottom panel was wrong. The pattern for this piece says to case on 78 sts but reading further in the pattern it tells me to pick up 60 stitches to attach it to the front. This led to the bottom panel being WAAAAYYYY too big. I had to rip and reknit which never makes me happy
- Stupid crochet chains for the handles were a pain to me since I do not crochet. Then stupid me cut them right at the knot, not compensating for stretch and eventual slippage out of the knot. I had to redo all of the chains with double knots and weaving the ends into the knitting.
- I bought a little too much yarn. I had one more side panel to knit for the bag and I panicked. I couldn’t imagine that I would have enough to finish the bag up. So I placed an order for two more skeins only to find that I have about 1.5 skeins left from my 9 skeins total. I probably would have been ok with 7 afterall.
- The Ugly: I can’t say that I like this bag all floppy when it is not full of stuff. I mean,the reason I loved this bag was for the shape that you see in the picture. So I got some boning, like that which is used in corsets, and added that to the side panels. Although this did not make them perfectly straight, it did help to give the bag more structure which I like a lot.

Knit Time: January 12 – March 6
- I was knitting two projects at once and had to wait for the extra yarn and find the perfect button.

That is very cool! Love it.
Beautiful – love it! Makes me want to buy the book and make one too!
Beautiful bag, and the button is perfect! I read something recently about making internal structure for knitted bags with plastic needlepoint canvas, but I don’t know if that’s something that could be added in after the fact.
Hi – The bag looks fantastic! You have given me inspiration to really do it. It is definitely on the list for this year. I hope you kept notes because I will need a cheat sheet. Congratulations!
The bag is gorgeous! And thanks so much for the pattern reviews, it is very helpfull.
That is simply gorgeous! I love herringbone, I love read, and I love big bags, so that’s like a trifecta of awesome right there. Great work!
Beautiful bag! One question…about the bottom part you mentioned…are you suppose to just cast on 60 sts then instead of the 78 that it says?
Absolutely gorgeous! Will definitely add it to my “to do” list. Thanks for the review.
I love the stitch pattern on that!
About the comment on needlepoint canvas…to stiffen my knit bags, I’ve used needlepoint canvas covered with buckram (or any heavy interfacing), then covered with a “lining” fabric. If the bag has a lacy pattern, I usually use a matching fabric (poly satin or broadcloth). If the bag is solid (herringbone or cabled pattern, for example), a contrasting fabric is nice. I usually cover the canvas with a heavy interfacing so the texture of the plastic canvas isn’t apparent through the knitted fabric.
This trick also works when you’re stiffening a brim for a knit hat.
I love it . . . and I am in the middle of making it myself. I will have to read ahead to check out the pick up stitches bit. Looks like it makes a great knitting bag!
That is one awesome bag. Beautiful color and the perfect button.
Ditto- the comments about the plastic needle point canvas – it works.
The bag is gorgeous. Actually the pics are really nice.
It looks great! I like your idea of adding boning to the sides. How are you liking the new blogsite? I am debating moving over as well for the easier commenting but customizing seems more cumbersome. Oh, and happy belated birthday! Welcome to the land of 30s!
Really nice bag! I love the color you chose, and your pictures look awesome too.
It’s FABULOUS!!!!! Well done, Monique!
Oh, I forgot to tell you that one of the best ways I”ve found to give a knit or felted bag some structure is to adhere Timtex or Peltex to the lining fabric. It works beautiful, and the bag will stand on it’s own. I always get a supply when Joann’s has 50% off their interfacing.
That bag is awesome! You know, if it’s too big, I’ll take it off your hands! 😉
Fabulous!! I have been waiting to see this bag knit up. Great job. I love it!
I love it, it really is gorgeous! The color is great, and the stitch pattern also!
ABSOLUTELY BEAUTIFUL!!! I’m so jealous.
Pingback: WIP Weekend Update - Belated just like by birthday party « The Lint Knitter
Thanks so much for sharing your experience. This bag is on my too-long “to do” list and I haven’t seen much blogging about it. I love the way yours turned out and I love the boning idea!
Fabulous bag! Lovely shape in a style that will never date.
Pingback: It may well appear… « Sulala
Your bag came out beautiful. I just bought my yarn to make this bag. I love your handles too. I got in touch with wild fibers yarn shop for the handles. I didnt speak to the owner (on vacation) but the lady on the phone said she had some wooden handles. She said she didnt see those exact ones. They dont have a catalog for me to order and no infor on their website. How did you get your handles from wild fibers? do you live near there or did you order online or over the phone?
Your bag looks amazing! I’m making mine now and have finished the front and back and I’m now working on the sides. I’m nervous about the bottom, though. What do you suggest I do? Thanks in advance for your help!
I really like your bag. The size seems cool to me, but I have a habit of taking knitting AND a book to work every day. So what will you do with the remaining yarn? I think you have enough to make a hat.
Wow, that’s a beauty! Adding the boning was genius.
Hi there,
I know this post is from a while back, but I saw your comments about the base and thought I should let you know that the instructions in my book are correct. The reason you pick up fewer sts for the joining than you cast on for the bottom is that the gauge for the joining stitch (stst bind off) is different to the gauge for the herringbone stitch.